Note: The free X (Twitter) account has a limit of 17 posts per day and 500 posts per month. These limits apply per app (you can manage multiple X accounts with one app). You can upgrade your X (Twitter) developer plan if needed.
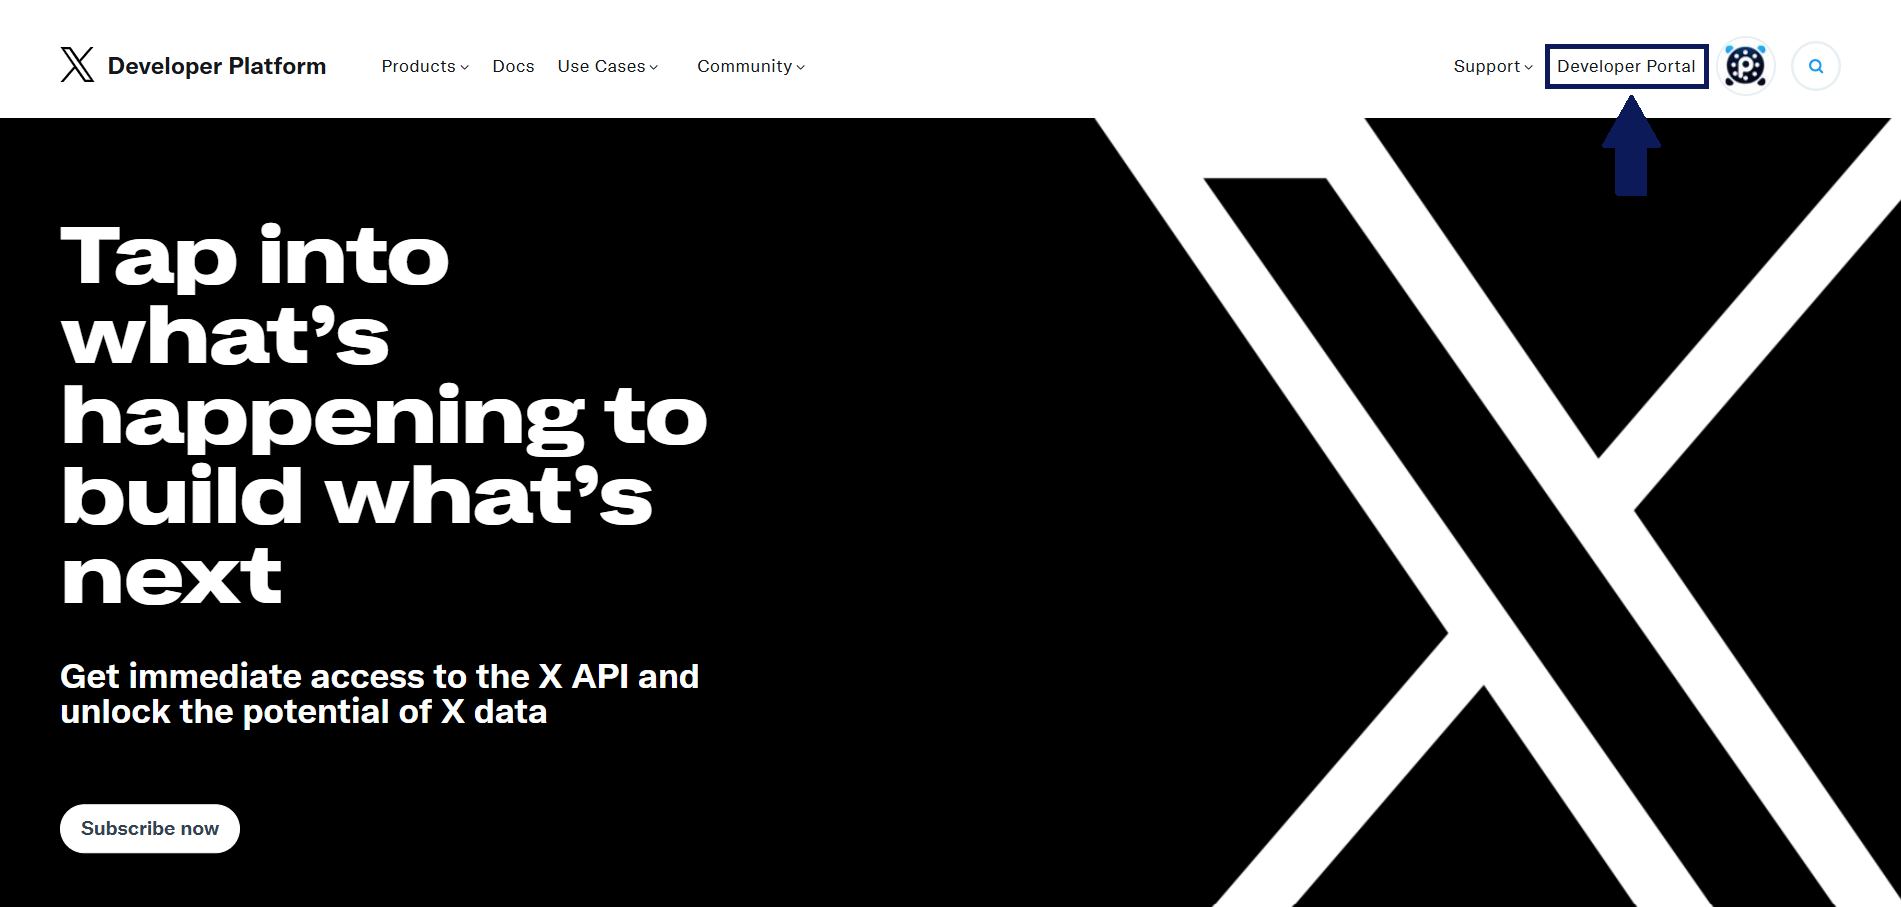
1) Go to the X developer page.
2) Click the Developer Portal button in the top right. If your X (Twitter) account isn’t logged in, click Sign in.
3) If you’re entering the Developer Portal for the first time, you’ll be asked to select a membership type.
Click the small “Sign up for Free Account” button and complete the free registration.
4) During registration, you’ll be asked: “Describe all of your use cases of X’s data and API:” You can copy the following text in English (minimum 250 characters):
I will use this X app to publish and manage content on my own X (Twitter) accounts through the Plexorin social media management tool. Plexorin allows me to create, schedule, and publish posts across multiple networks from a single dashboard. Connecting this app enables automated publishing, analytics, and inbox features for my personal X accounts only. This app will not be offered to third parties or the public; it will be used solely for my business workflows and for testing posting features securely within Plexorin.
After completing the form, check and confirm the agreement boxes.
5) In the portal, go to Projects & Apps → Default project in the left menu, and open your created project.
6) On the project page, open the User authentication settings tab and click Set up.
7) Apply the following settings exactly as shown:

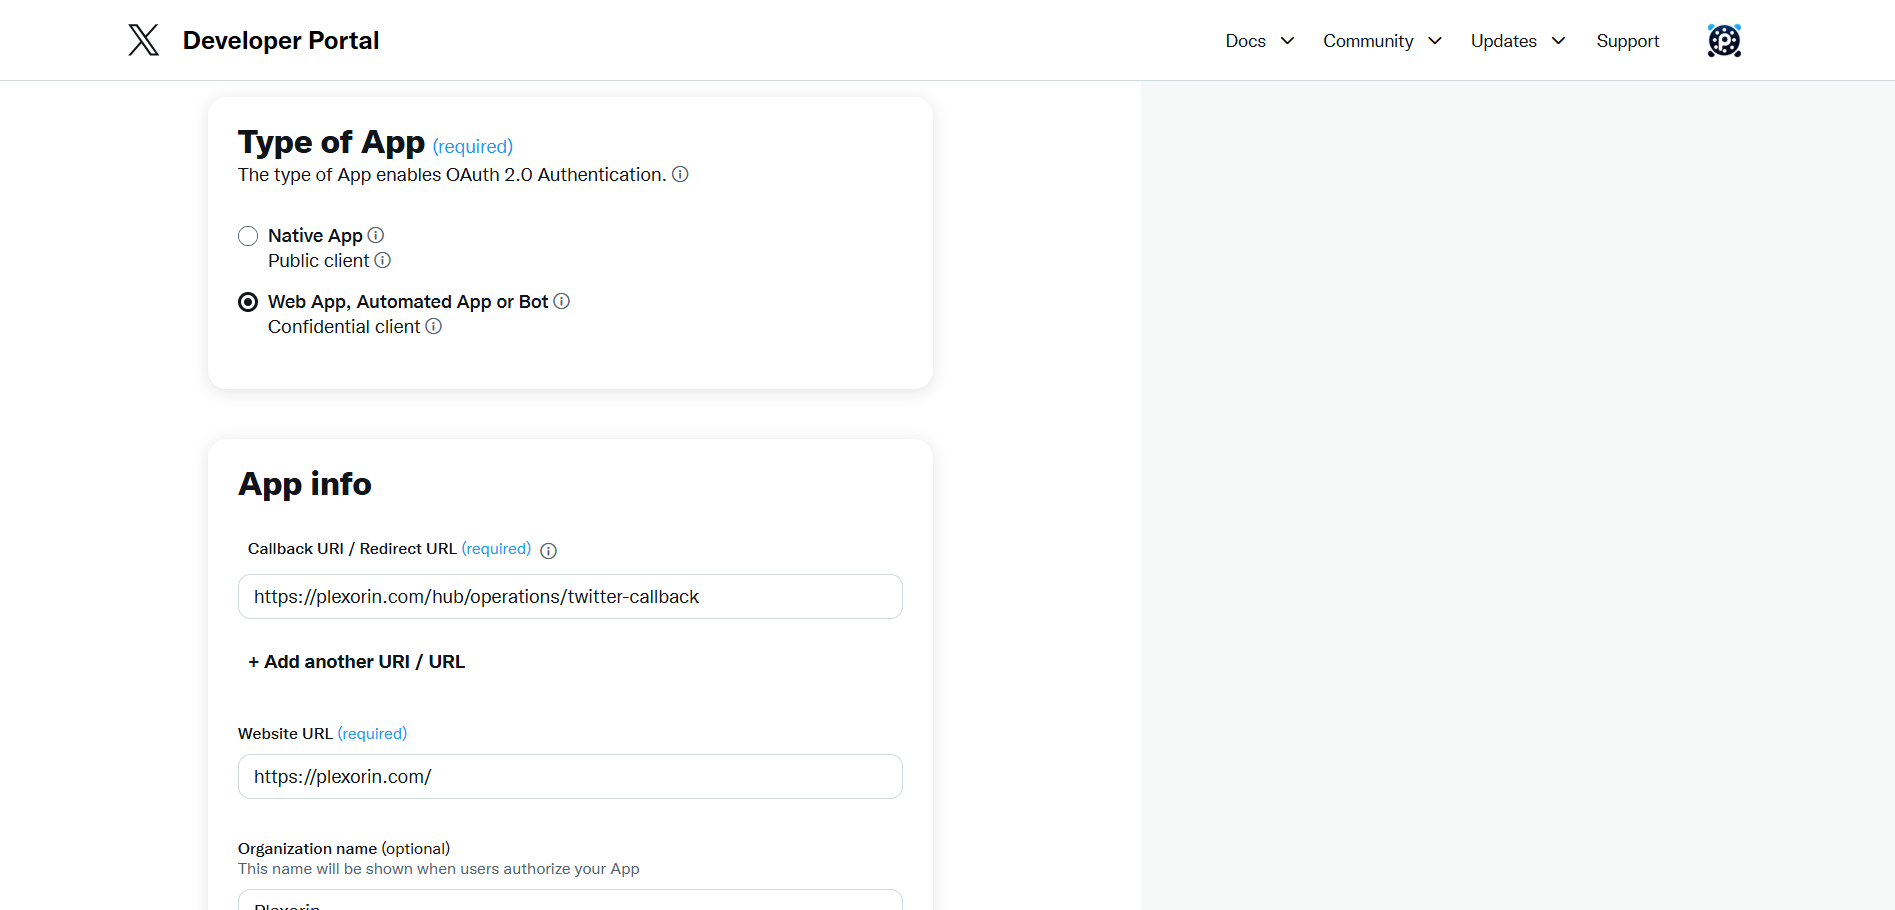
Read and write and Direct messageWeb App, Automated App or Bothttps://plexorin.com/hub/operations/twitter-callback
https://plexorin.com/
Tip: The Callback URL must be an exact match, including whether or not there’s a trailing slash.
8) After saving, you’ll receive your Client ID and Client Secret.
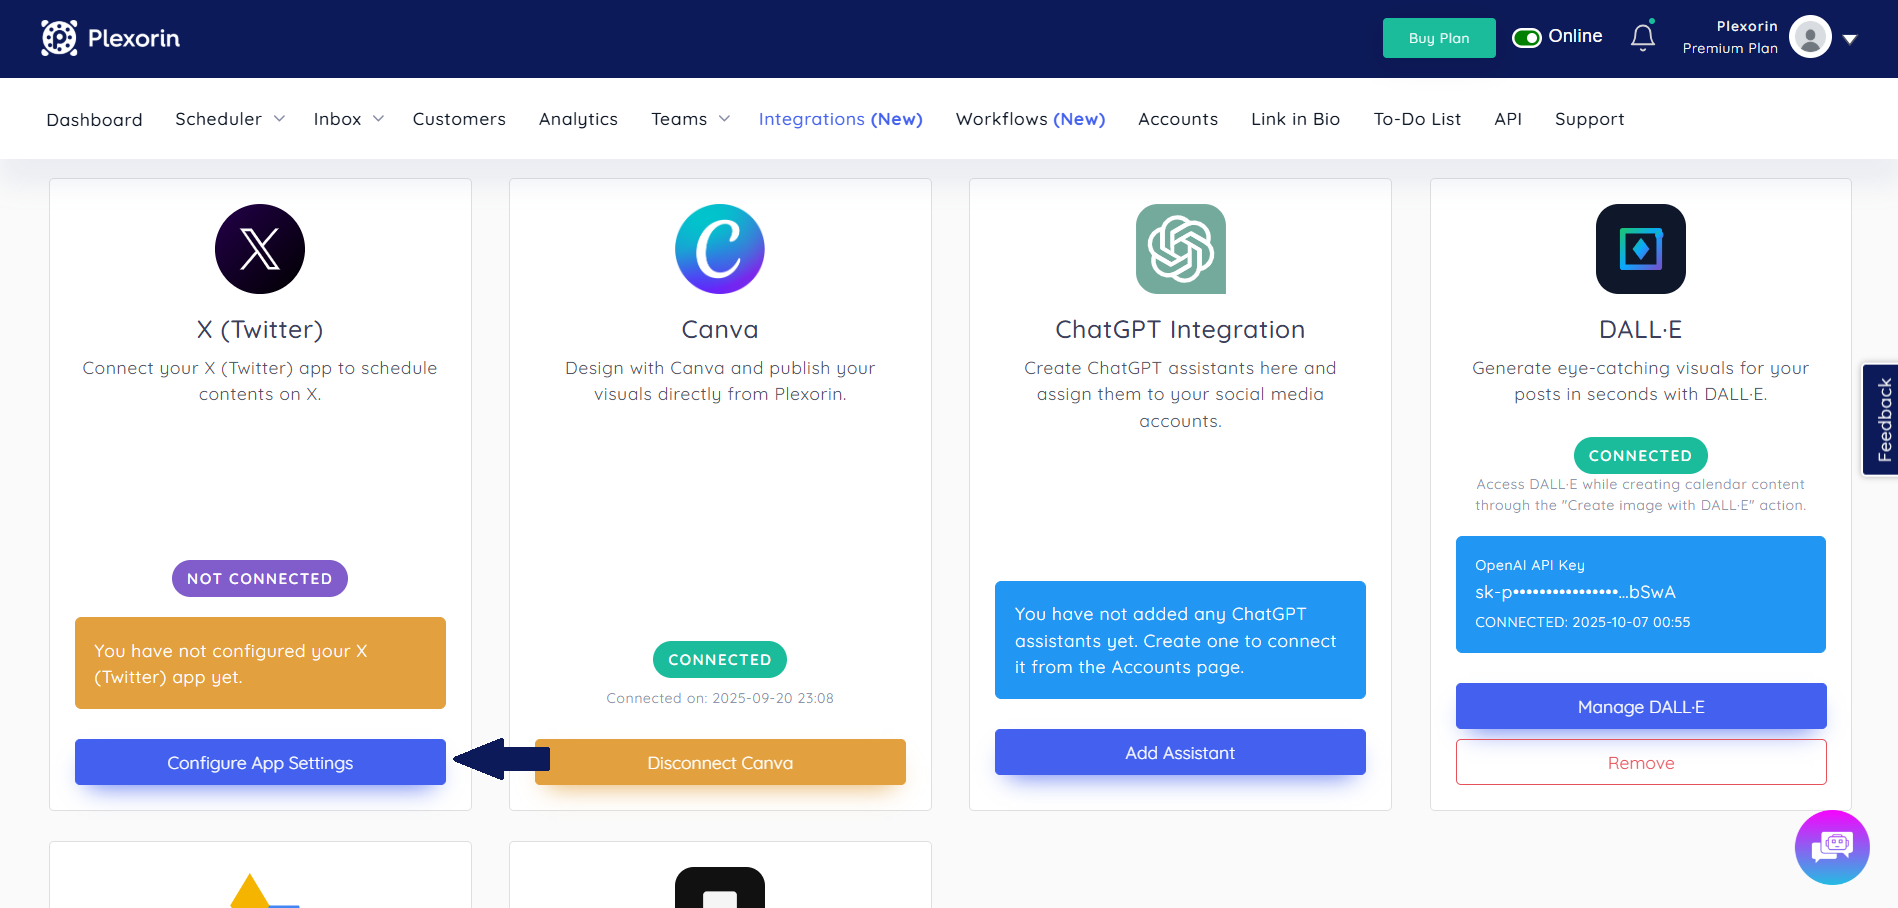
9) Log in to Plexorin and go to the Integrations page.
10) Click the “Configure App Settings” button under the X (Twitter) integration.
11) In the opened form:
Then, go to the Accounts page, click Connect New Account, and link your X (Twitter) account.
1) Callback URL mismatch / redirect_uri error message
https://plexorin.com/hub/operations/twitter-callback2) invalid_client / Client authentication failed
3) 403 – insufficient permissions / DMs not allowed
4) authorization_code/expired / OAuth flow stuck
5) Rate limit / Too many requests
https://plexorin.com/hub/operations/twitter-callbackhttps://plexorin.com/How do limits work on the free X (Twitter) plan?
You can post up to 17 times per day and 500 times per month. These limits are per app, and one app can manage multiple X (Twitter) accounts.
Can I use multiple X (Twitter) accounts with one app?
Yes. Once your app is connected to Plexorin, you can authorize multiple X (Twitter) accounts under the same app.
Why is the Callback URL important?
It’s essential for secure and accurate OAuth flow completion. The Callback URL in X (Twitter) must match Plexorin’s URL exactly.
Why should I enable “Direct message” permission?
Plexorin uses this permission for DM-based reply and messaging features. Without it, your app will have limited functionality.
I forgot or leaked my Client Secret—what should I do?
Go to your X (Twitter) Developer Portal, rotate your Secret, and update it on the Plexorin integration screen.
By following these steps, you can securely connect your X (Twitter) account to Plexorin, schedule and publish content from one dashboard, and streamline your operations. If you encounter issues, review the checklist above; if problems persist, contact our support team.


Learn how to create a strategic social media content calendar in 2026 to boost engagement and streamline your posting schedule effectively.

Discover the ideal 2026 Facebook post sizes and specifications to maximize your social media engagement with perfectly optimized visuals.

Discover what a carousel is on social media, how to create effective carousel posts, and why they boost engagement and storytelling.